Introduction to Glide, Image Loader Library for Android, recommended by Google
In the passed Google Developer Summit Thailand, Google introduced us an Image Loader Library for Android developed by bumptech named Glide as a library that recommended by Google. It has been used in many Google open source projects till now including Google I/O 2014 official application.
It succeeded in making me interested. I spent a whole night playing with it and decided to share my experience in this blog post. As a begining, I must say that it looks 90% similar to Picasso. To be more precise, I think it is something like a Picasso-clone.
Anyway it is quite different in details. You will learn how.
Import to project
Both Picasso and Glide are on jcenter. You can simply import it to your project with dependency like this:
Picasso
dependencies {
    compile 'com.squareup.picasso:picasso:2.5.1'
}
Glide
dependencies {
    compile 'com.github.bumptech.glide:glide:3.5.2'
    compile 'com.android.support:support-v4:22.0.0'
}
Anyway Glide also needs Android Support Library v4, please don't forget to import
support-v4 to your project like above as well. But it is not kind of a problem since Android Support Library v4 is basically needed in every single new-age Android project.
Basic
As I said, it is very similar to Picasso. The way to load an image to ImageView with Glide is quite the same as Picasso.
Picasso
Picasso.with(context)
    .load("http://inthecheesefactory.com/uploads/source/glidepicasso/cover.jpg")
    .into(ivImg);
Glide
Glide.with(context)
    .load("http://inthecheesefactory.com/uploads/source/glidepicasso/cover.jpg")
    .into(ivImg);
Although it looks quite the same but in details Glide is designed far better since
with doesn't accept only Context but also Activity and Fragment. Context will be automatically extracted from those things you throw in.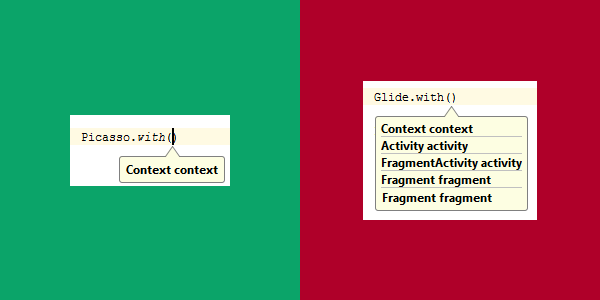
And the brilliant benefit from passing Activity/Fragment to Glide is: image loading would be integrated with Activity/Fragment's lifecycle for example, pause loading in Paused state and automatically resume on Resumed state. So I encourage you to pass the Activity or Fragment to Glide not just a Context if possible.
Default Bitmap Format is RGB_565
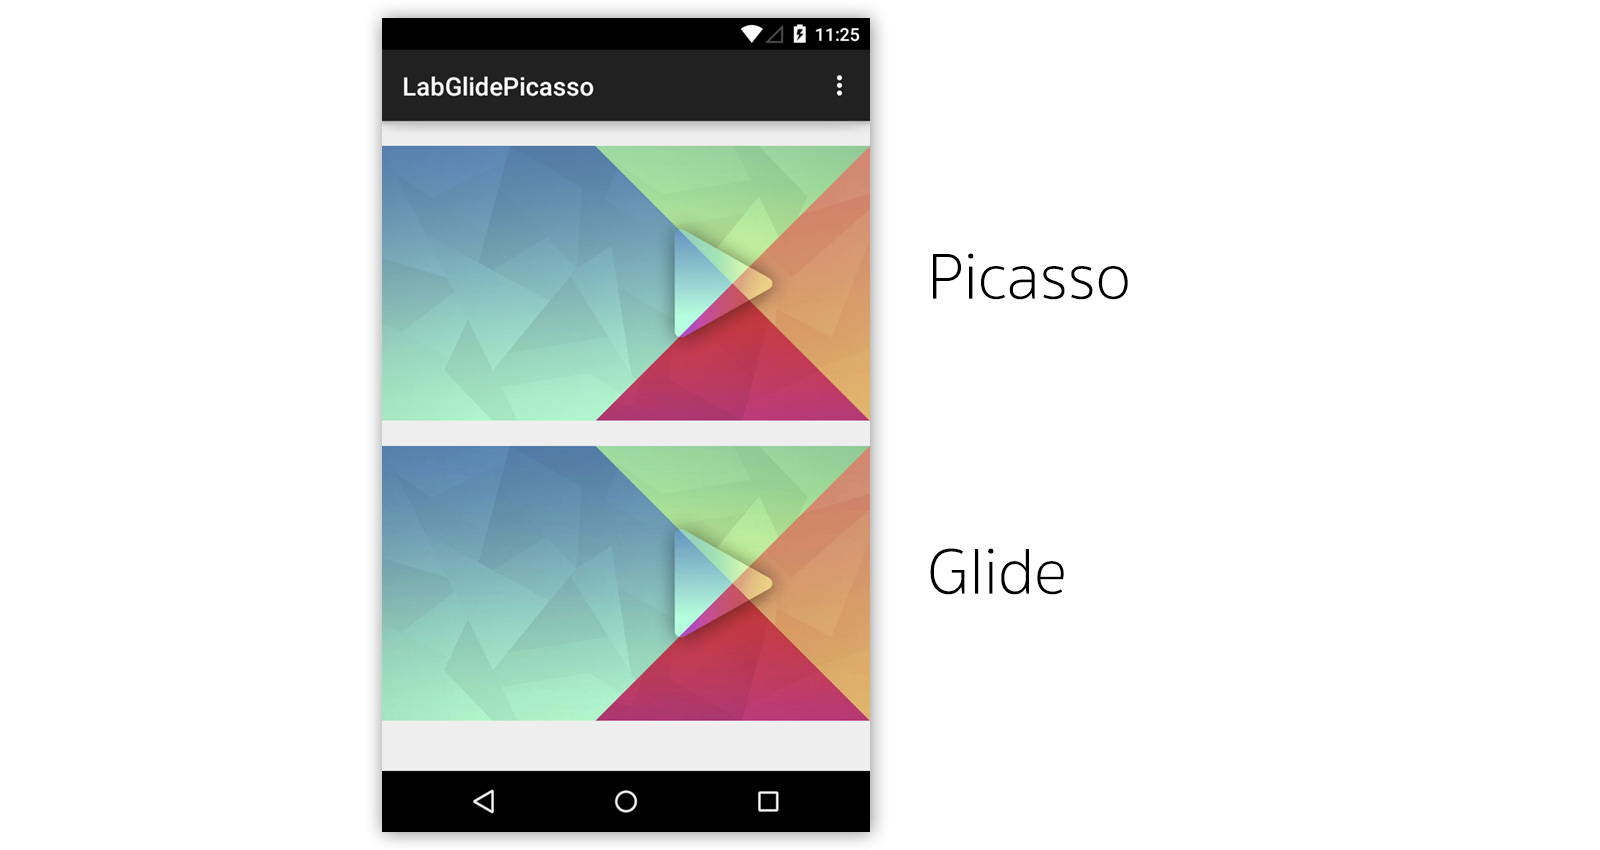
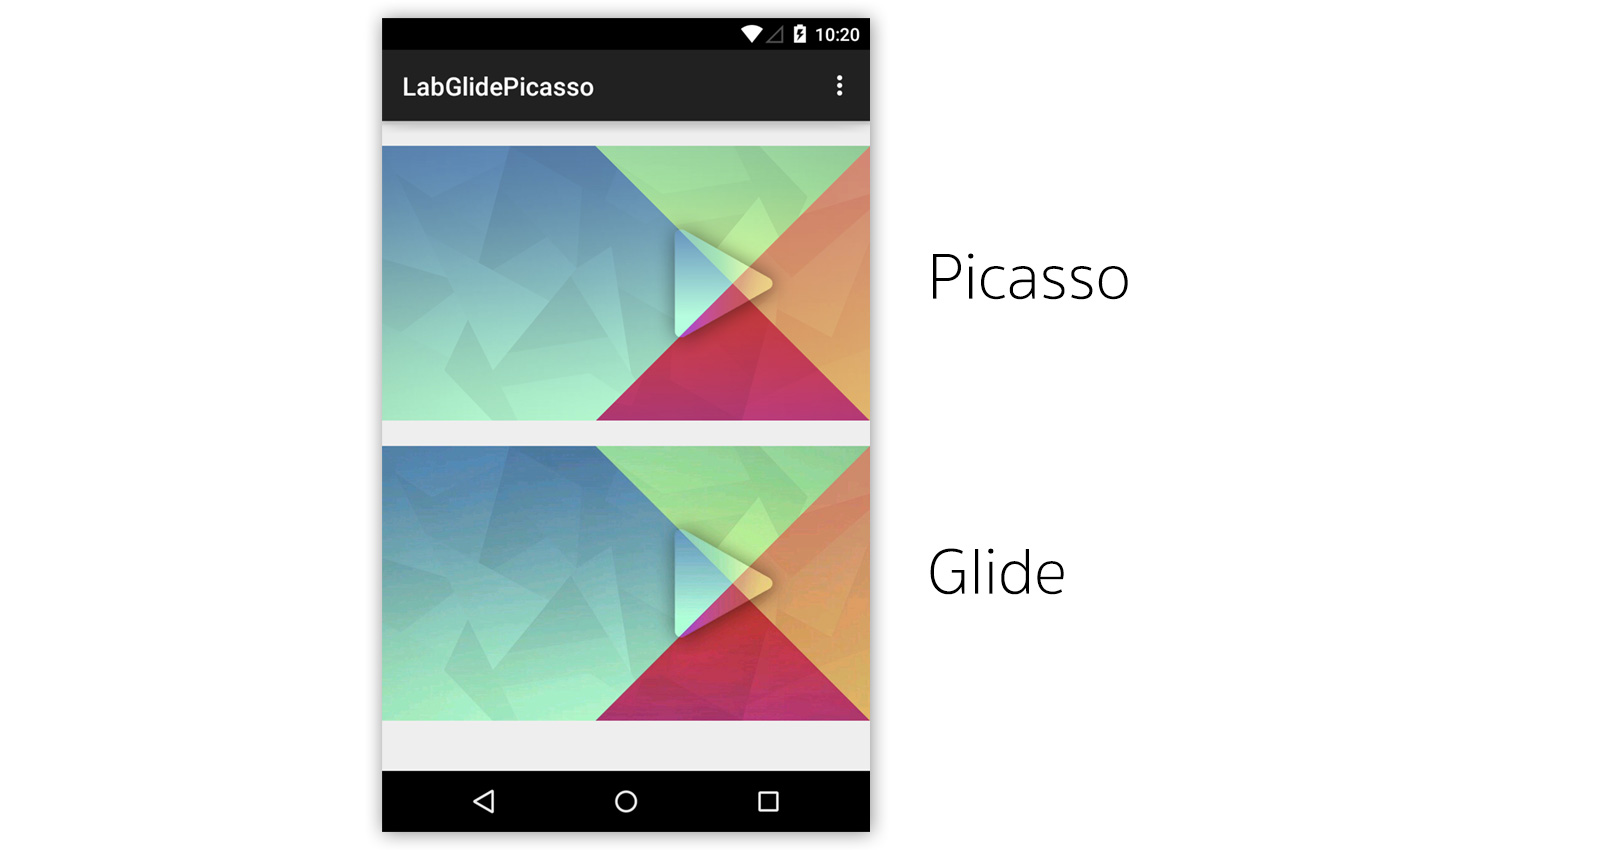
Here is the result of image loading comparing to Picasso. (1920x1080 pixels image is loaded into 768x432 pixels ImageView)
You can notice that image loaded by Glide has the worse quality compared to Picasso. Why? This is because Glide default Bitmap Format is set to
RGB_565 since it consumed just 50% memory footprint compared to ARGB_8888.
Here is the memory consumption graphs between Picasso at ARGB8888 and Glide at RGB565. (Base application consumes around 8MB)
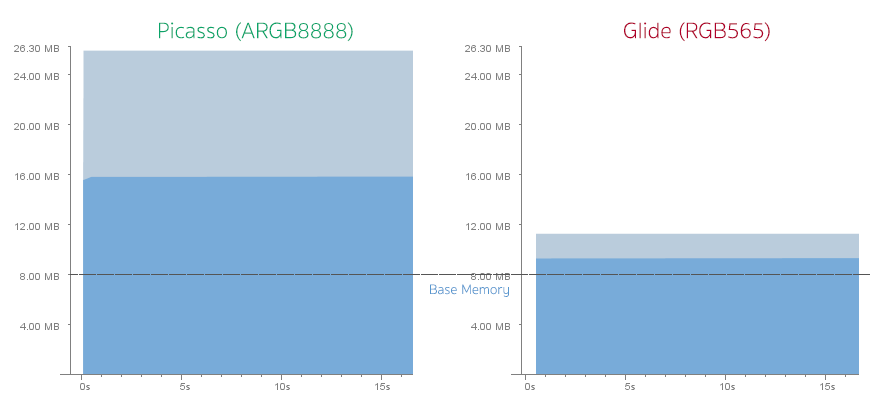
You don't have to do anything if you are ok with the image's quality already. But if think it is unacceptable or just not good enough for you, you can switch Bitmap Format to
ARGB_8888 by creating a new class which extended from GlideModule like this:public class GlideConfiguration implements GlideModule {
@Override
public void applyOptions(Context context, GlideBuilder builder) {
// Apply options to the builder here.
builder.setDecodeFormat(DecodeFormat.PREFER_ARGB_8888);
}
@Override
public void registerComponents(Context context, Glide glide) {
// register ModelLoaders here.
}
}
And then define it as
meta-data inside AndroidManifest.xml<meta-data android:name="com.inthecheesefactory.lab.glidepicasso.GlideConfiguration"
android:value="GlideModule"/>
It looks far better now!
Let's take a look at memory consumption graphs once again. It appears that although Glide consumes almost 2 times than previous but Picasso still consumes a lot memory footprint more than Glide.
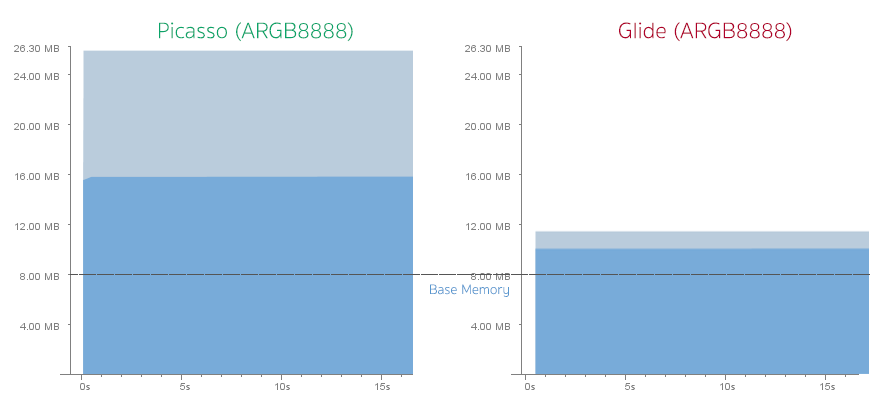
The reason is Picasso loads the full-size image (1920x1080 pixels) into the memory and let GPU does the real-time resizing when drawn. While Glide loads the exact ImageView-size (768x432 pixels) into the memory which is a best practice. Anyway you can change the behavior of Picasso to do the same with
resize() command:Picasso.with(this)
.load("http://nuuneoi.com/uploads/source/playstore/cover.jpg")
.resize(768, 432)
.into(ivImgPicasso);
But the problem is you need to manually calculate the ImageView's size. Or if your ImageView has the exact size (not set to wrap_content), you can simply do like this.
Picasso.with(this)
    .load("http://nuuneoi.com/uploads/source/playstore/cover.jpg")
    .fit()
    .centerCrop()
    .into(ivImgPicasso);
Memory consumption graphs are now finally almost the same !
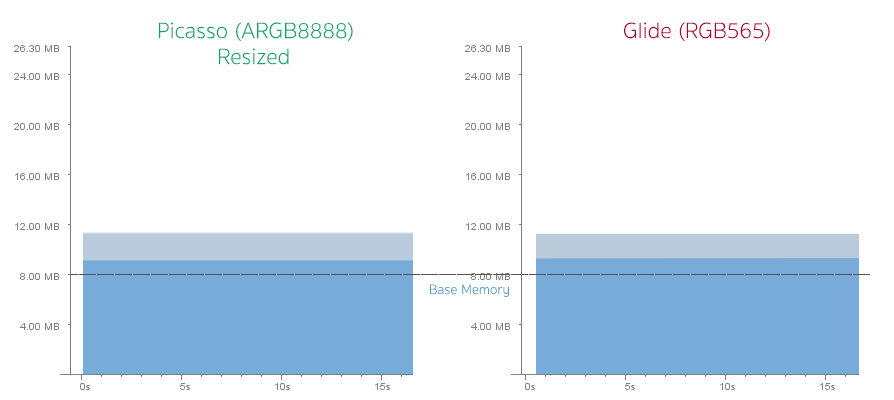
Although memory consumption are quite the same but I must say that Glide beats Picasso in term of functionality of this part since it could calculate the ImageView size automatically in every single case.
Image's quality in details
Here is the result when I tried to zoom an ImageView to the actual size.
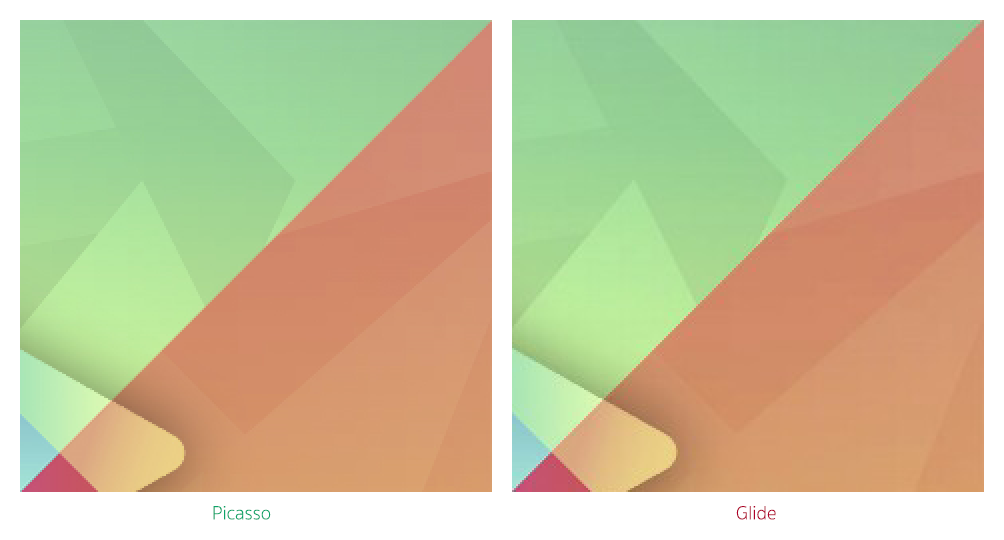
It is noticeable that image loaded by Glide has some hard pixels and is not as smooth as the Picasso one. And till now, I still couldn't find the straight way to change image resizing algorithm.
But if you ask me is it bad? I would say that it is not that noticeable in real use. Quality is acceptable but you just need to set Bitmap Format to ARGB_8888, that's all.
Disk Caching
Default disk caching concept of Picasso and Glide are quite different. From the experiment, the same Full HD image is loaded into ImageView with Picasso and Glide. When I checked the cache folder, it appears that Glide cached the ImageView-size (768x432 pixels) while Picasso cached the full-size one (1920x1080 pixels).
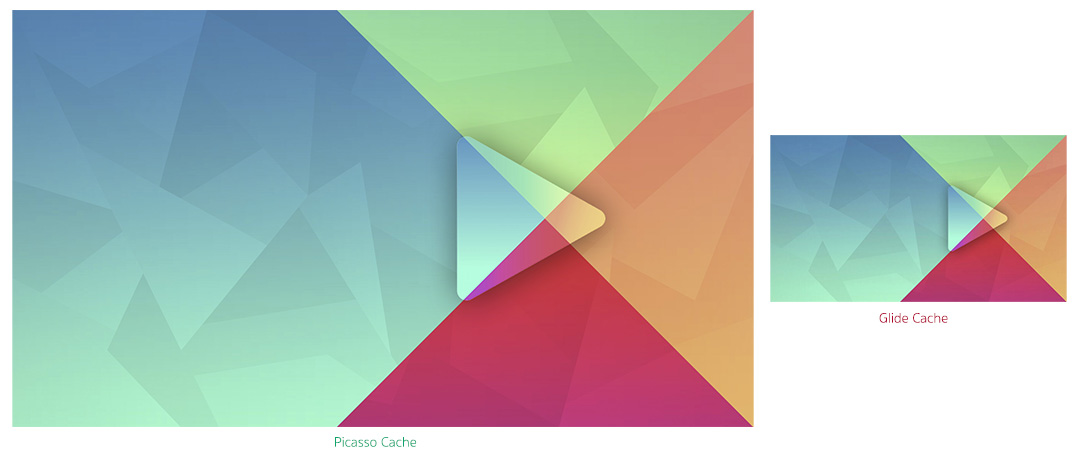
And yes, hard pixels described above is also there. In addition, if image is loaded in RGB565 mode, the cached image will be also in RGB565.
When I tried to adjust ImageView to the different sizes. The result is whatever the size is, Picasso will cache only single size of image, the full-size one. Glide acts differently, caches separate file for each size of ImageView. Although an image has already been loaded once but if you need to load another size the same image, it needs to be downloaded once again before be resized to the right resolution and then be cached.
To be more clear, if there is an ImageView in the first page with 200x200 pixels dimension and there is the another one in the second page with 100x100 pixels that are needed to show the same image. You have to download the same image twice.
Anyway you could adjust its behavior by let Glide cache both the full-size image and the resized onewith this command.
        Glide.with(this)
             .load("http://nuuneoi.com/uploads/source/playstore/cover.jpg")
             .diskCacheStrategy(DiskCacheStrategy.ALL)
             .into(ivImgGlide);
The next time image is requested to show on any ImageView, the full-size image would be loaded from cache, resized and then cached.
An advantage of the way Glide was designed is image could be loaded and showed very fast. While the Picasso way causes some delay on loading since it needs to be resized first before is set to an ImageView even you add this command to make it showed immediately.
//Picasso
.noFade();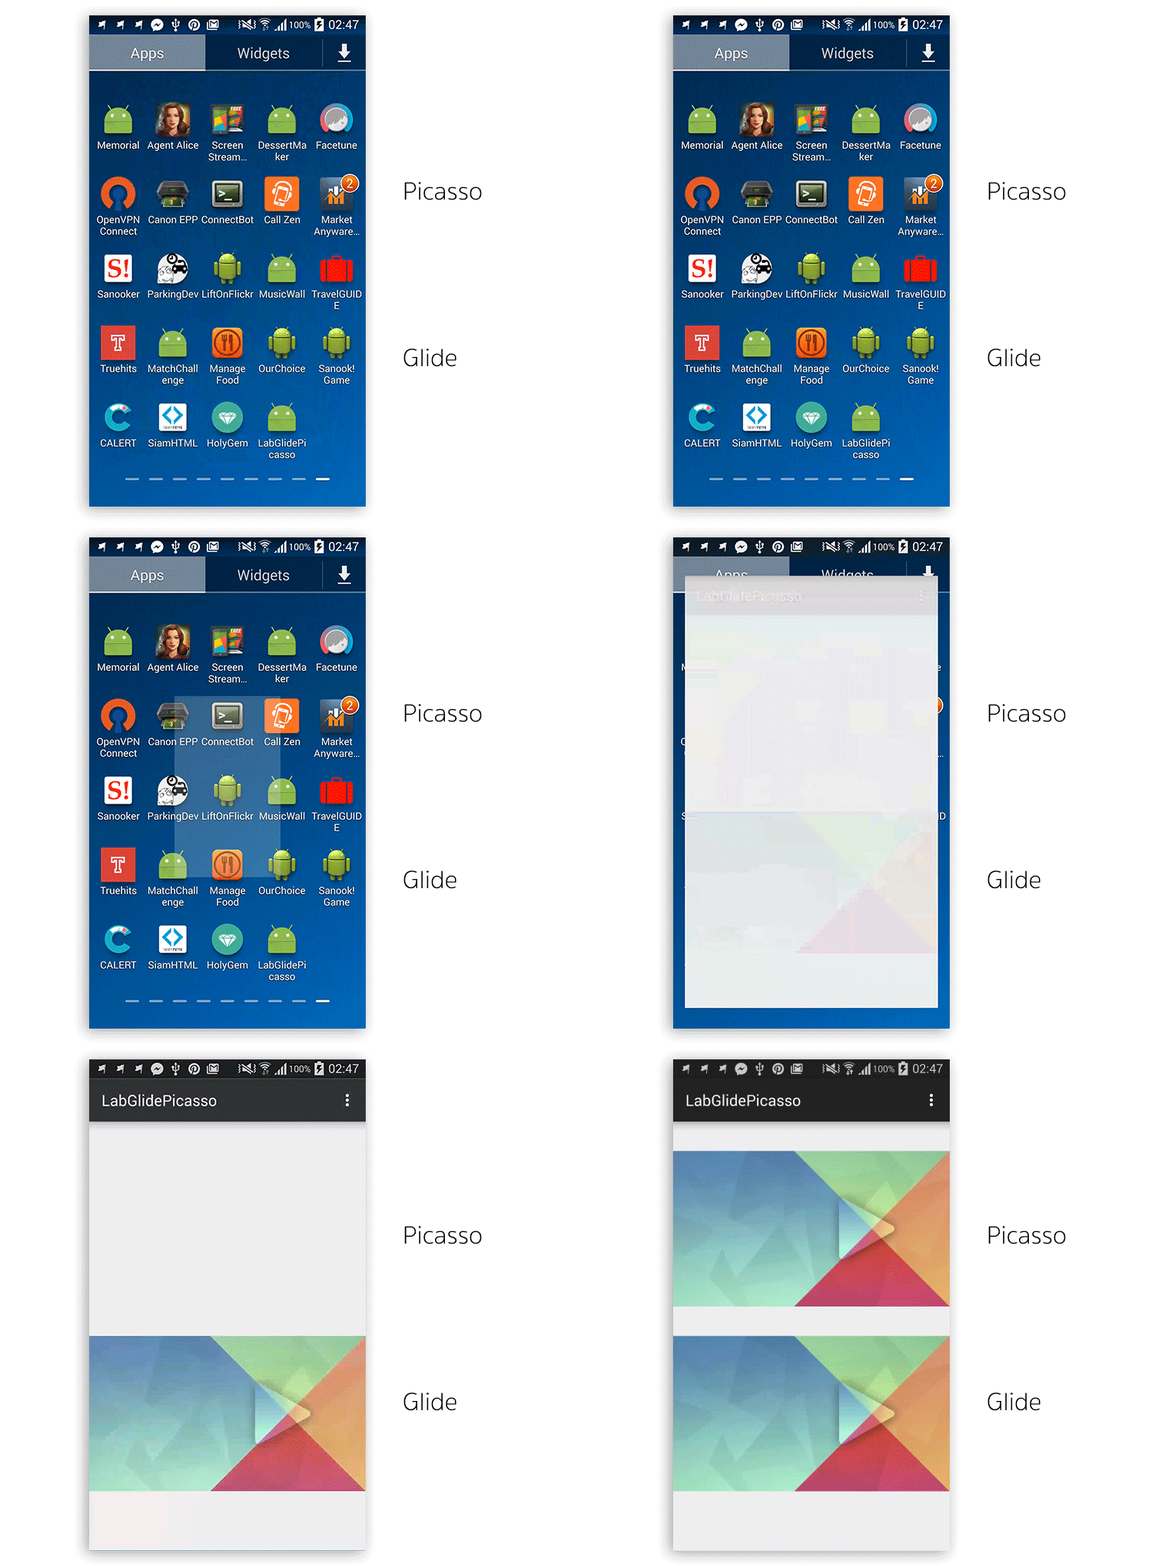
There is some trade off between Picasso's and Glide's way of disk caching. You can choose the way fit your app's requirement best.
For me, I prefer Glide to Picasso since it is far faster although it needs more space to cache the image.
Features
You can do almost all the same things just like Picasso can do with the same style of coding for example, Image Resizing
// Picasso
.resize(300, 200);

// Glide
.override(300, 200);
Center Cropping
// Picasso
.centerCrop();

// Glide
.centerCrop();
Transforming
// Picasso
.transform(new CircleTransform())

// Glide
.transform(new CircleTransform(context))
Setting the Placeholder and Error image
// Picasso
.placeholder(R.drawable.placeholder)
.error(R.drawable.imagenotfound)

// Glide
.placeholder(R.drawable.placeholder)
.error(R.drawable.imagenotfound)
As I said, if you are familiar with Picasso, moving to Glide would be just like chewing a candy for you. =)
What that Glide has but Picasso doesn't
An ability to load GIF Animation to a simple ImageView might be the most interesting feature of Glide. And yes, you can't do that with Picasso.
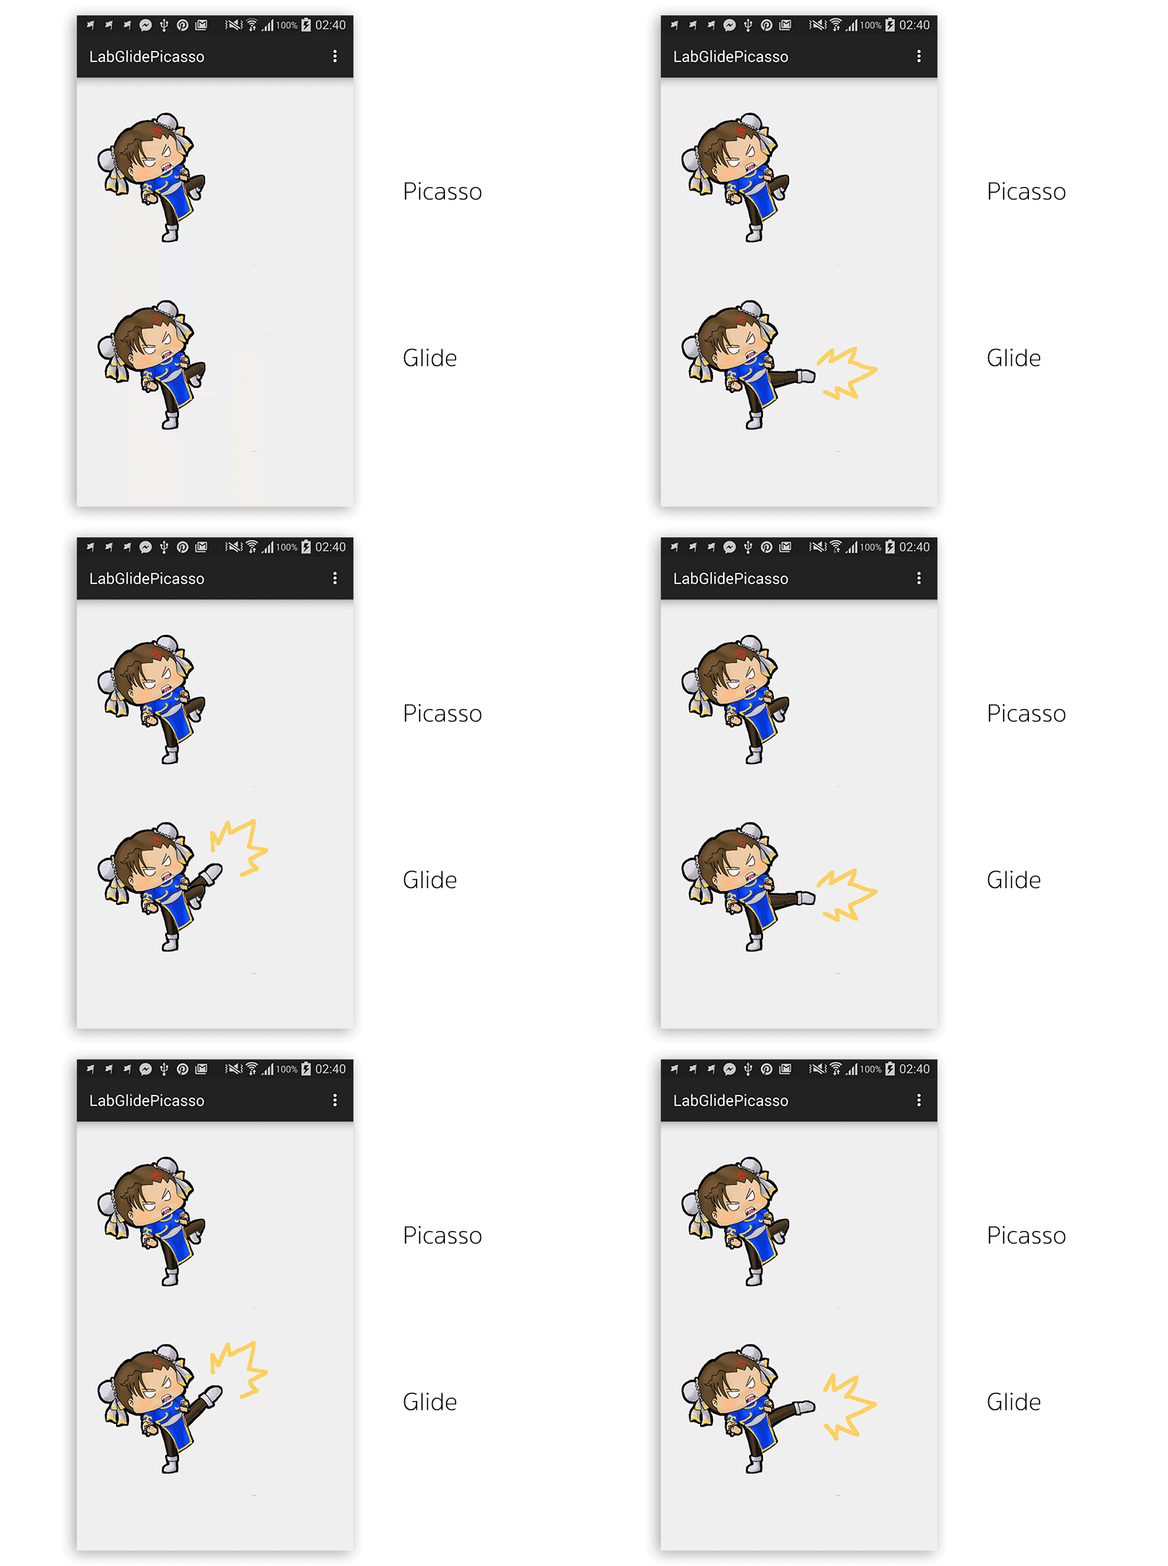
And since Glide is designed to work perfectly with Activity/Fragment's lifecycle so the animation would be automatically paused and resumed along with Activity/Fragment's state.
The way Glide caches is still be the same, resized first and then cached.
Anyway from an measurement I found that GIF Animation consumes quite a lot of memory. Please use it wisely.
Besides GIF Animation loading, Glide is also able to decode any local video file to a still image.
Another feature that might be useful is you can configure the way image appears with an Animator (R.animator) while Picasso could do only one animation, fading in.
The last one if you could generate a thumbnail file of an image you loaded with
thumbnail().
Actually there are some other features you can play with but most of them are not that important for general use for example, transcode an image into Byte Array, etc.
Configurations
You can adjust so many configurations for example, size and location of disk caching, maximum limit of memory caching, Bitmap Format and many more. You can read more about this at Configuration page.
Library's size
Picasso (v2.5.1)'s size is around 118KB while Glide (v3.5.2)'s is around 430KB.
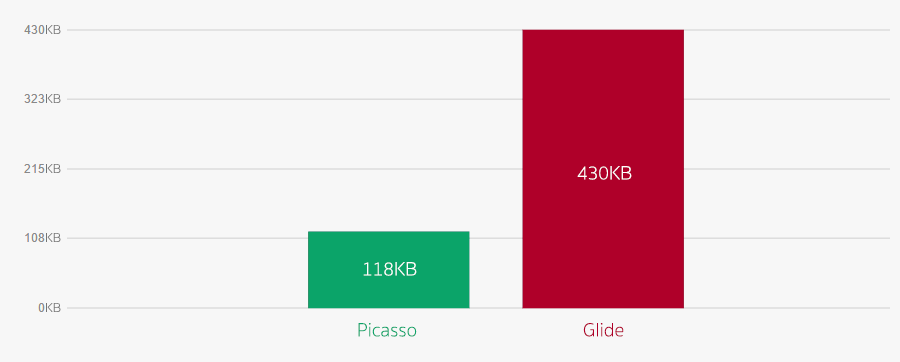
Anyway 312KB difference might not be that significant.
Method count of Picasso and Glide are at 840 and 2678 respectively.
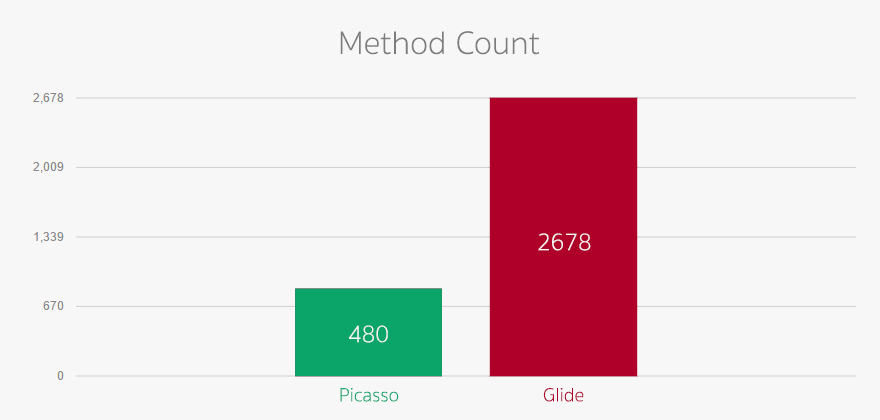
I must say 2678 is quite a lot for 65535 methods limit of Android DEX file. ProGuard is recommended to turn on if you choose Glide. (And you should turn it on anyway for production release).
Conclusion
Neither Glide nor Picasso is perfect. The way Glide loads an image to memory and do the caching is better than Picasso which let an image loaded far faster. In addition, it also helps preventing an app from popular OutOfMemoryError. GIF Animation loading is a killing feature provided by Glide. Anyway Picasso decodes an image with better quality than Glide.
Which one do I prefer? Although I use Picasso for such a very long time, I must admit that I now prefer Glide. But I would recommend you to change Bitmap Format to ARGB_8888 and let Glide cache both full-size image and resized one first. The rest would do your job great!
Resources
There are not so many online resources related to Glide. But here are what I found. Please take a look on links below.
Nguồn: The Cheese Factory :: Blog


0 nhận xét:
Đăng nhận xét